Olympus 35 SP
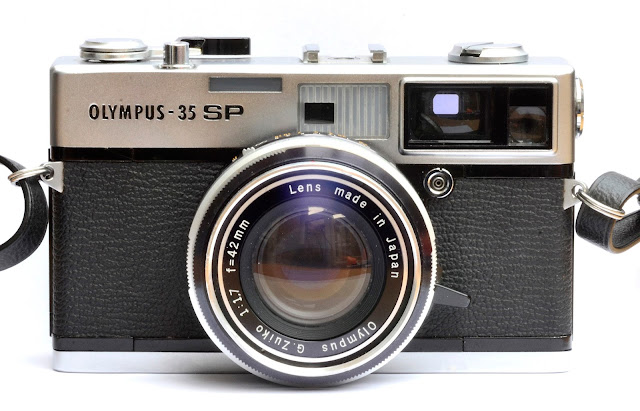
I had read a lot about the Olympus 35 SP rangefinder camera and almost all of it was extremely positive. So when the chance to get one arose I didn't hesitate. Some users say that it is as good as a Leica. I've never had the chance to use a Leica so I won't be able to compare but let's see what this camera has got going for it.
The Olympus 35 SP was produced between 1969 and 1972 with probably around a quarter of a million produced. The camera itself uses 35mm film. It has a Zuiko 42mm f1.7 7 element lens which has a reputation of being extremely sharp. It has fully automatic or metered manual exposure modes. And it is the only rangefinder camera with centre weighted and spot metering. It does use a battery for the meter but all the photo taking operations are mechanical so it can be used without a battery.
My favourite digital camera is my Fuji X100S. So purely on appearance the Olympus is off to a good start. Surely cameras like the 35 SP were used as an inspiration when the Fuji X100 series were designed.
The camera came with a black leather case with a black velvet lining. It's an 'ever ready' type case. The top half can be detached for easier access. On my example the plastic strap is not very flexible and tends to get in the way. I think I will replace it when I get a chance. However the light meter is always on so if it isn't covered up then it is using the battery. And while we are on the battery the original power source was a 1.35v mercury cell. These are no longer available on environmental grounds. Most modern cells are 1.5v and although they can be used they will cause the meter reading to be out unless the meter has been re-calibrated. There are various ways to adapt the camera to use a modern cell and they're easy to find on the internet. An easier, though not necessarily cheaper, solution is to use a Wein Cell. These are designed to deliver 1.35v though do not last as long as the old mercury cells.
Film loading is fairly standard. One feature I like is the recessed base plate. This enables the film cassette to be put in the camera without requiring the rewind handle to be pulled upwards. The back is opened by pulling down a small catch on the left bottom of the camera. This catch looks exactly the same as the one on an Olympus trip. Of course, both cameras are of the same era.
The ASA (ISO) is set by turning the dial on the side of the camera. ASA (ISO) range is from 25 to 800. This is important if the camera is used in metered automatic mode.
The controls on the top plate are fairly standard with a wind-on lever, exposure counter, shutter release and flash hot shoe. There is also the film rewind handle.
The controls for shutter speed, aperture and focus are all located on rings on the lens. From the front of the lens the first rings controls shutter speed, the middle ring controls exposure and the back ring with the black plastic handle is the focus. There is also a self timer switch which can be seen just below the '5.6' in the above photo. In fully automatic mode both the shutter speed and aperture rings are set so that the 'A's line up, as in the photo.
In manual or metered manual mode the shutter speed and aperture rings are turned so that the desired settings line up with the red dot on the lens. In fully manual you can shoot with these settings. If you want to use metered manual mode then you need to look through the viewfinder to take a meter reading. At the top of the viewfinder is an EV range from 3 to 17. A green needle will indicate the EV reading when the camera is pointed at the subject. You need to remember the reading and set the aperture and shutter speed rings so that the measured EV reading appears in the gap in the shutter speed dial. It is perhaps easier to explain with the photo below. Here a meter reading of EV 15 shows through the shutter speed ring. This gives f16 and 1/125th second exposure (at ISO 200). If both rings are turned together the EV15 is constant as the shutter speed and aperture change. It's quite a neat system and once you're used to it it is very fast and accurate to use.
That's exposure sorted. Once done you will need to use the viewfinder to frame the image. The viewfinder has bright guidelines for framing with parallax marks inside the full frame. Focusing is achieved using the rangefinder spot in the central area of the viewfinder. The focusing lever is turned until the two images in the central spot line up. It's easy for anyone who has used a rangefinder before. If you haven't used a rangefinder it may take a minute or two to get used to it but after that you should find it very easy and accurate to use. Once happy with focus depress the shutter release to take the photograph.
A quick word about the lens. It's a 42mm focal length lens with a maximum aperture of f1.7. The designation on the front is G Zuiko. G is the seventh letter of the alphabet which designates that the lens has 7 elements. Reportedly this produces a very sharp image with great contrast and colour. I intend to explore these characteristics in the future.
The front of the camera has windows for the viewfinder, rangefinder and exposure meter. It also has a PC socket for connecting a flash.
One of the features that makes this camera unique for a rangefinder is the spot meter option. On the back of the camera is a button which when pressed will take a meter reading from the centre of the viewfinder using the approximate same area as the rangefinder focusing spot. In automatic mode the button has to remain pressed in while the shutter is released. This is a useful feature when taken photographs with a backlight.
The picture below shows the viewfinder eyepiece on the back left of the camera.
So what's the camera like to use? In the hands it feels well made and well balanced. All the controls are in the right place for easy access and quick use. There are no superfluous controls, you've only got what you need to take pictures. Obviously in fully automatic mode all you need to worry about is framing and focusing so you don't miss many shots. The 42mm lens is supposedly the equivalent of what you see with your eyes and it is a focal length I enjoy using. It should be good for street photography. I intend to try this out with some black and white film soon. I've only put one roll of Kodak Colorplus 200 through but I can see myself using this as a holiday camera as well as something to take on trips to London.
Below are some examples from the first roll through the camera.
The Three Horseshoes, Winkwell, Bourne End. Taken fully automatic so exposure settings are unknown
Canal lock at Croxley Green. ISO 200, manual 1/250th second at f11
Fence posts and lock at Croxley Green. Fully automatic.
Storage warehouse. Fully automatic.
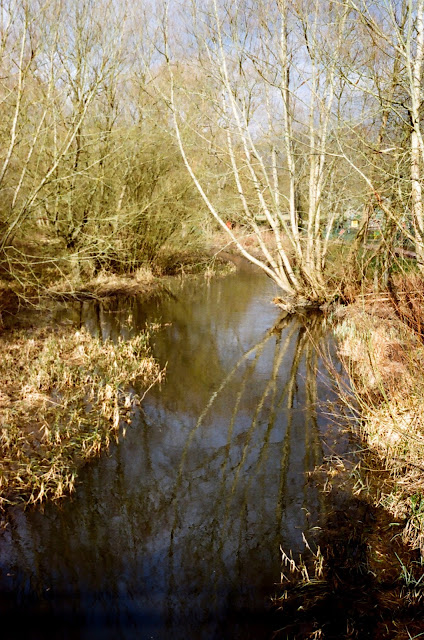
River Gade at Two Bridges, Watford. ISO 200 1/125th second at f16
Here are a couple more pictures that show how good the Zuiko lens is. Shot on Kodak Colorplus 200, Ilfracombe, Devon. Easter 2018
So in summary, a very promising debut for the Olympus 35 SP. I'm very glad to have got this camera for next to nothing and I'm sure I will be using it a lot more in the future. It will be interesting to see how well the battery lasts as Wein cells are fairly expensive. I may have to investigate alternatives. On Ebay these are going for £100 pounds plus in working condition. If you find one for less than that I'd recommend you snap it up. This is one of those classic cameras that deserves it reputation.


Comments
Post a Comment